

These trays were my first concept. I had watched a lot of videos about embedding LED lights in epoxy resin, and this was my first mad idea for putting the principles into practice.
The first attempt at making one of these was in October 2023. That one didn't even come close to my intentions. It's gathering dust now in the cellar. After a bit of trial and error, however, I got there.
The product is still in development, and will continue to evolve over time, but it's now a mature concept, suitable for all kinds of moods or occasions. You decide in both cases.
The Idea
I’m not sure exactly how or where the idea for these came to me. It’s easier to say when. Late summer 2023 would be the answer to that question. I had found a few simple LED lights online some time earlier, without yet having any big idea of what I was going to do with them. There are tons of videos on YouTube of people doing all kinds of wacky things with LEDs and resin. That’s at least half the attraction of the whole thing when you’re getting into it, but learning how to put them together is of course not something that you can do in a day. There’s a lot of trial and error involved. I’m not sure exactly how or where the idea for these came to me. It’s easier to say when. Late summer 2023 would be the answer to that question.
I had found a few simple LED lights online some time earlier, without yet having any big idea of what I was going to do with them. There are tons of videos on YouTube of people doing all kinds of wacky things with LEDs and resin. That’s at least half the attraction of the whole thing when you’re getting into it, but learning how to put them together is of course not something that you can do in a day. There’s a lot of trial and error involved.

And so, since this was absolutely my first experiment, it took a few goes before it took any kind of shape. Initially I was looking at some much more ornate handles for the trays, but of course there’s no point investing in those until I’ve got the technique of this right. So for the time being I’ve been using the cheapest handles that you can buy in bulk online. I painted a couple of sheets of MDF (which were far too thin to be able to use effectively), and naively tried simply gluing the lights down on the board.

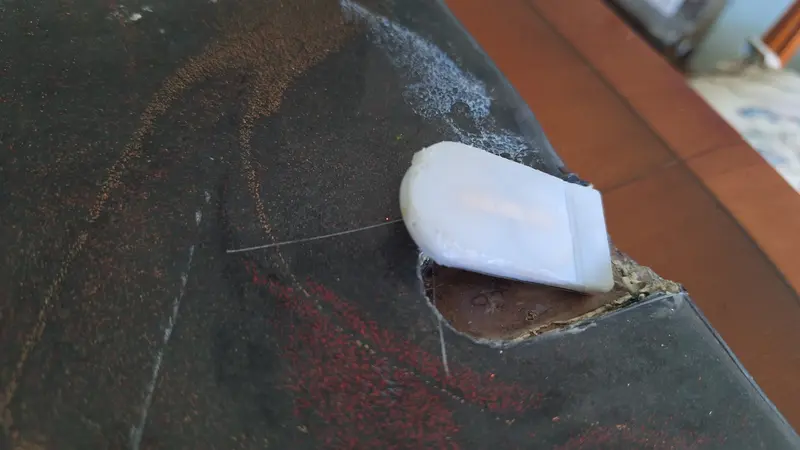
Well, that’s a long way from sufficient, I can assure you, not to mention the hardest bit – how to attach the battery compartment to the bottom of the tray, and how to add epoxy to the bottom without sticking the battery compartment together. The answer that I found was to use silicon around it, but as with everything else there’s a lot of trial and error involved with that.
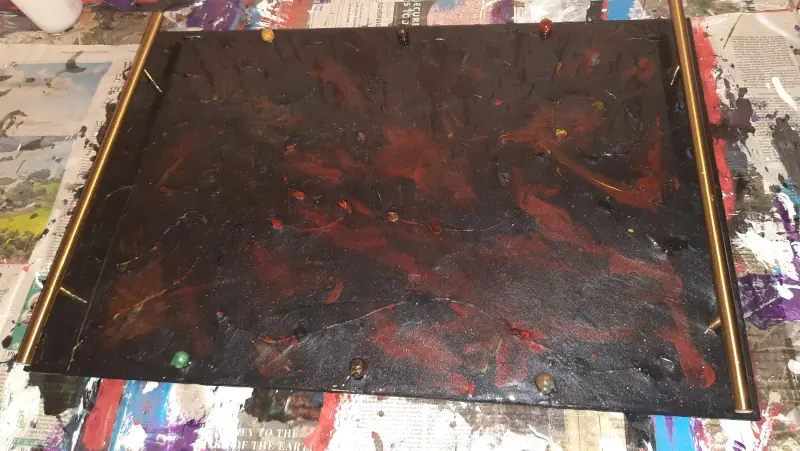
Above and below you can see pics of the first attempt, aforementioned. The idea was to have it ready for Hallowe’en 2023, and to sell a couple.
That was a little bit ambitious, but you can see at least here what I was trying to achieve with the Hallowe’en theme.
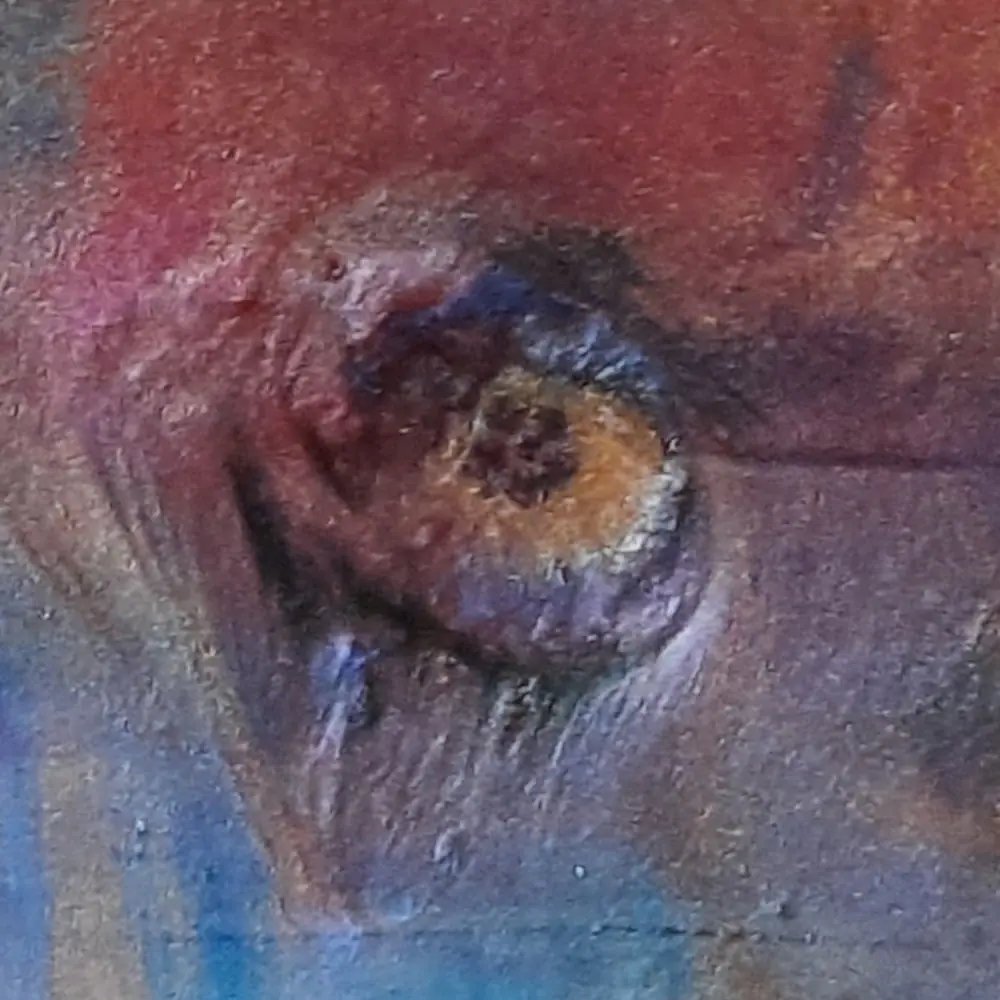
The lights don’t work, but that’s because I was careless removing the silicon (which has happened more than once, unfortunately).
The Alpha Prototype
After the first heroic failure, I gathered my thoughts and my energy.
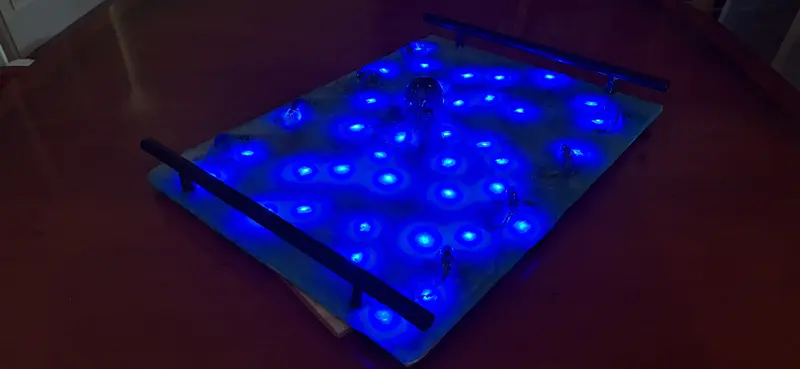
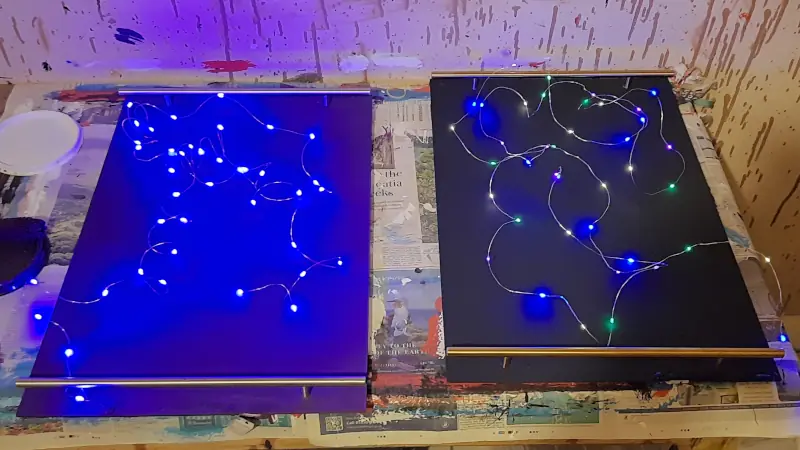
- Observation #1 – the size of the first tray was far too big. There were only 40 lights on the LED strings that I was using, so they looked a bit lost and isolated from each other on such a large board. No doubt it could work OK with a length of 100 or even 200 lights on such a board, but of course that’s going to be a lot more work to fix them down. So I needed to reduce the size of the board dramatically.
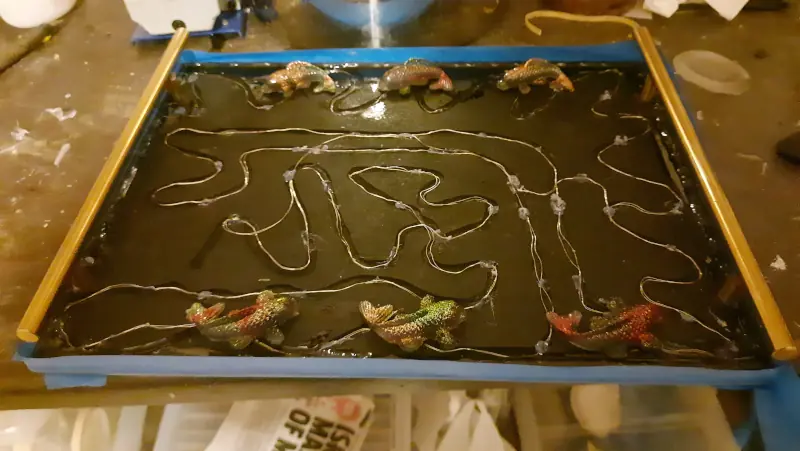
- Observation #2 – simply sticking the lights and the wires down to the board was never going to work, as some wire would always end up sticking out, and I would end up having to add a much thicker layer of epoxy than should be necessary. My solution, then, was to create a groove, using a router, in the board for gluing the lights down, in which the wire would sit. It was clearly already turning into something quite complicated, and none of that was going to work with the 3mm boards that I had experimented with initially. And so I doubled the thickness of the boards to 6mm.
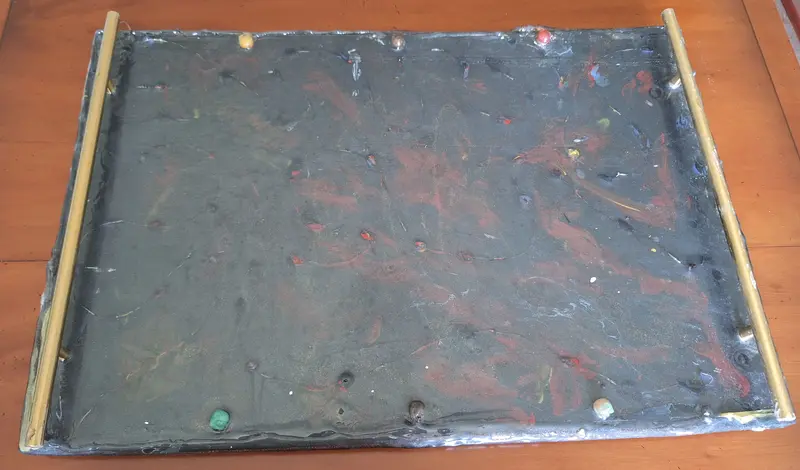
In the picture below you can see the wires sitting inside the groove that I made in the board. This technique worked OK and I persevered with for the "beta version" trays, in the next section, but the truth is that the method needed drastic simplification. I've figured it out. More on that in a later update.
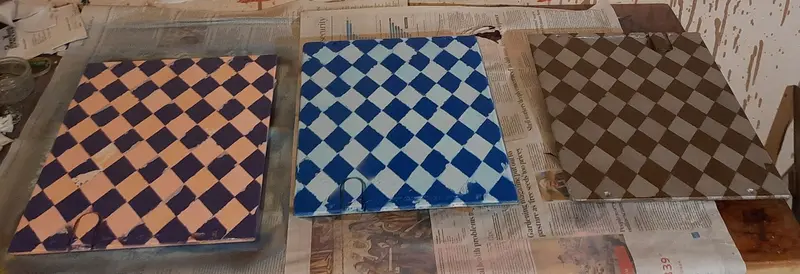
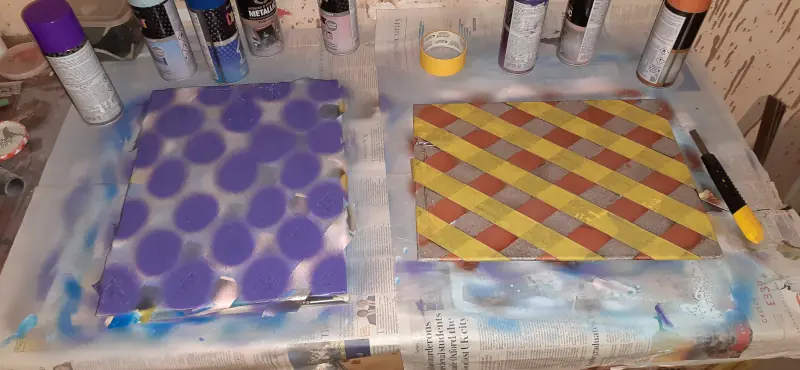
I fell down a bit of a rabbithole decorating the back of this tray and those that followed in the beta version. I was using spray paints, and trying to come up with a nice pattern. It worked fine on this one, but became overcomplicated on the three trays that followed.
All of which means that I almost certainly won’t be using spray paints on these trays in the future. Not for the whole thing, at least. Too much trouble, and there’s also the danger that it gets on the handles as well if you’re not careful.
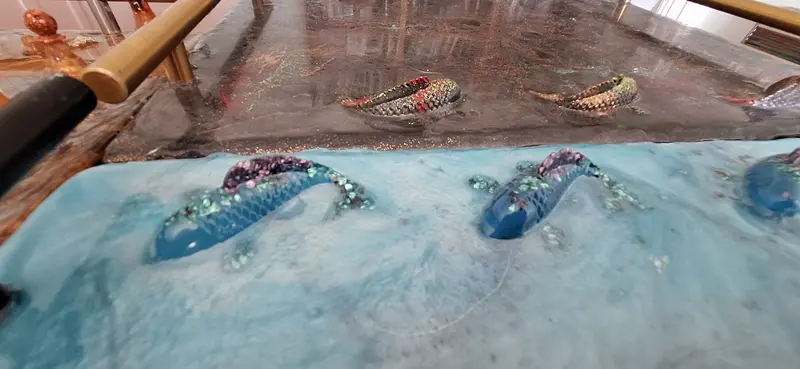
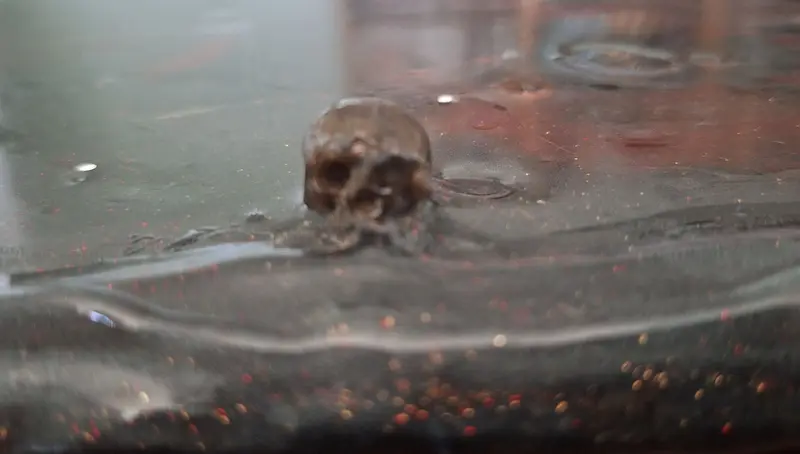
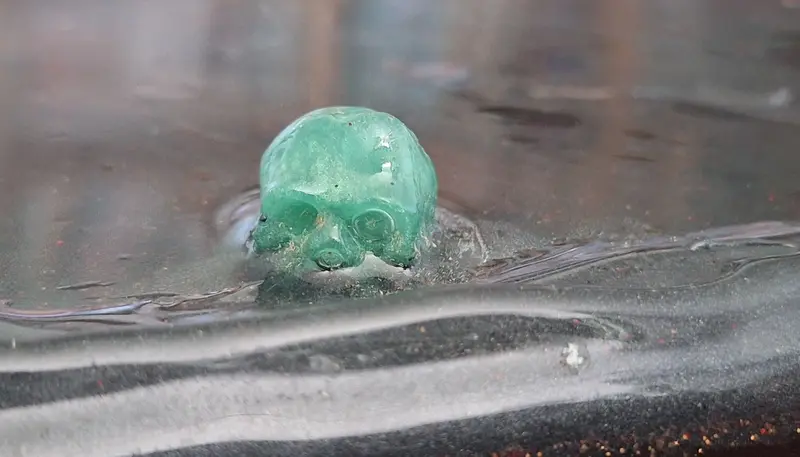
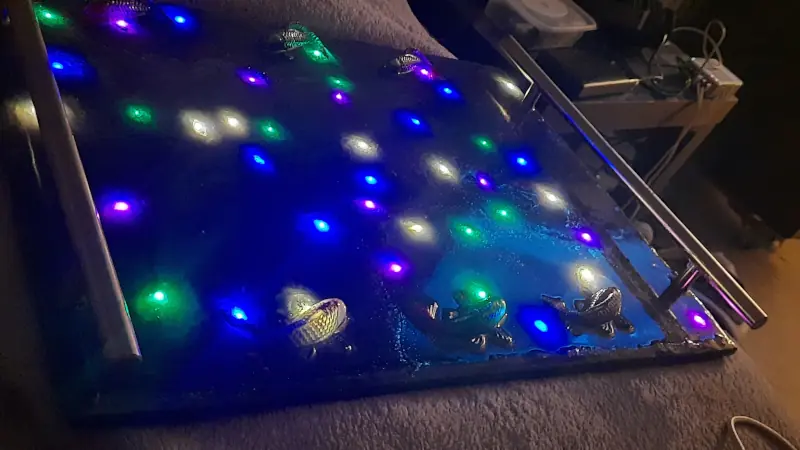
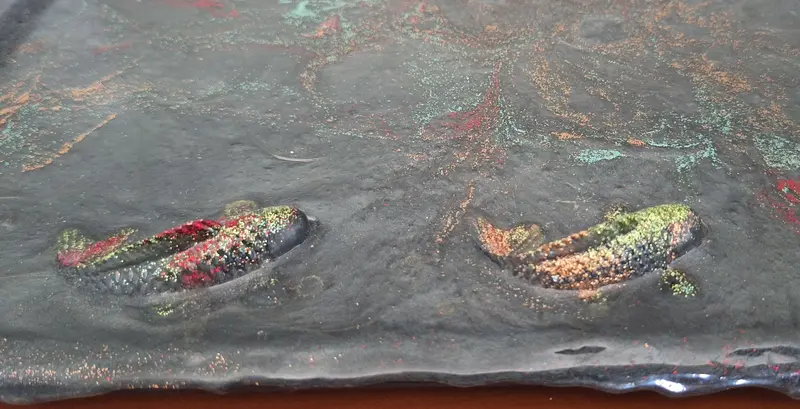
HOWEVER, the most important thing about this prototype was that once I finished decorating it with the koi (carp), which I'm very fond of, covered it with resin (notice the use of glitter), and very carefully removed the silicon, it worked.
Proof of concept. Now the real work began – how to get an efficient method by which I could churn these out? Onto the beta version, and beyond.
The Beta Version
As mentioned in the preceding text (the alpha version), I got a bit detained here with spray-painting the bottom side of these trays. I won’t get caught up too much in that technique from now on.
The final effect is cool, as you see here:
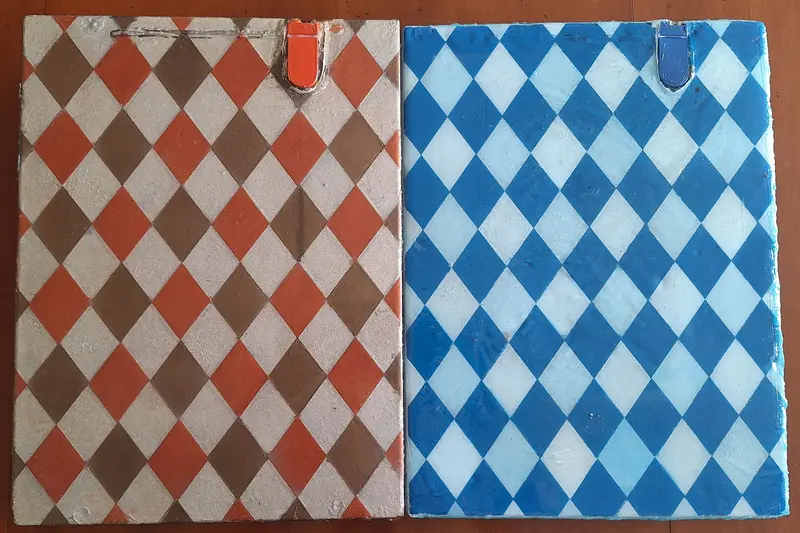
but it will be much simpler just to add a layer of simple wall paint, and work from there, OR perhaps I’ll be trying out some trays with jesmonite on the bottom. That could well look very interesting, but a layer of epoxy will probably still be necessary on top of that, as jesmonite can easily chip off when you’re not careful enough with it. That’s for a later trial, hopefully some time this summer (2025).
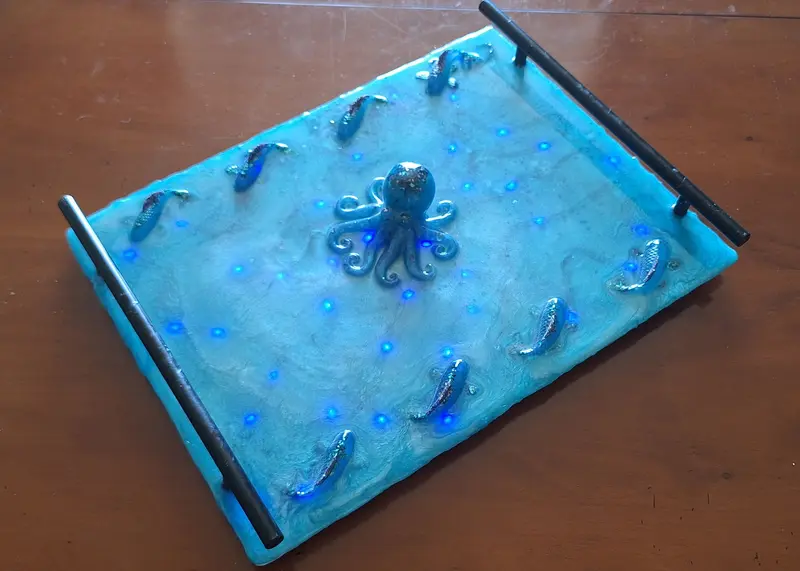
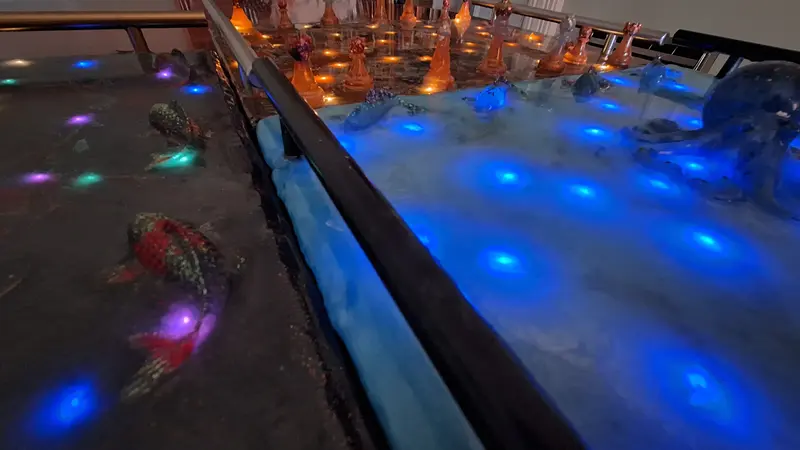
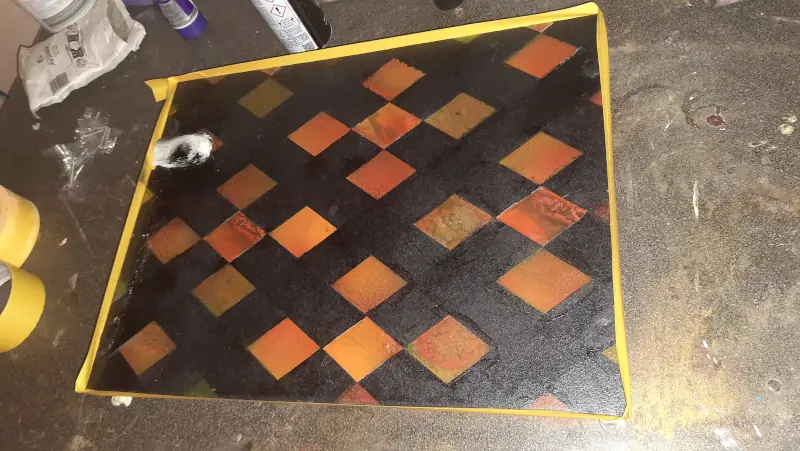
A keen viewer will perhaps notice that the groove for the wire is visible at the back of the copper-coloured tray. That's of course a lesson that is going to get acted upon, and in fact there's no visible wire on the blue tray, so I guess I already did something about the issue there.
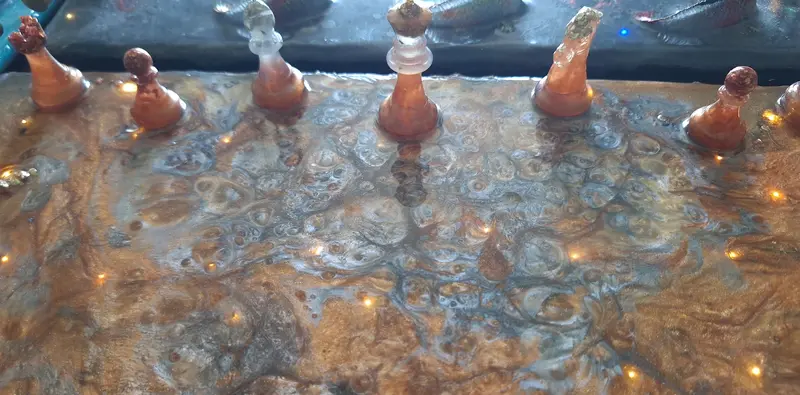
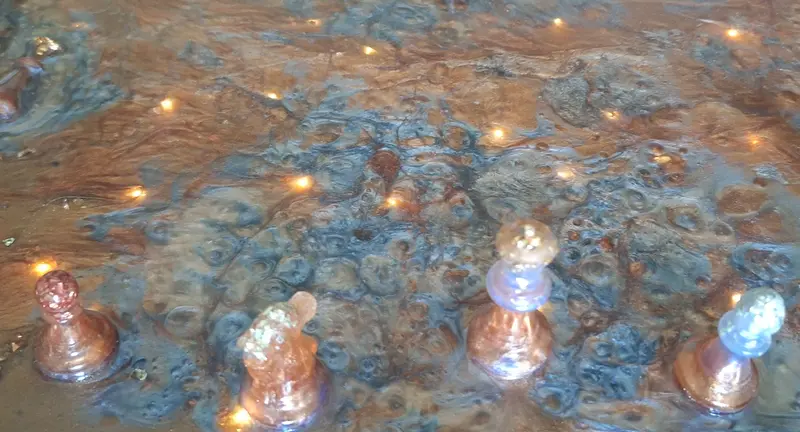
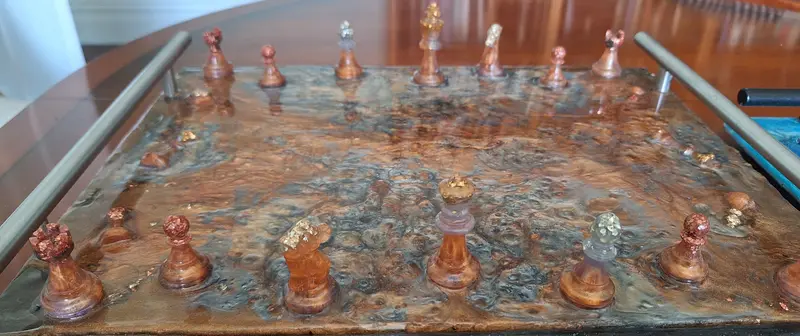
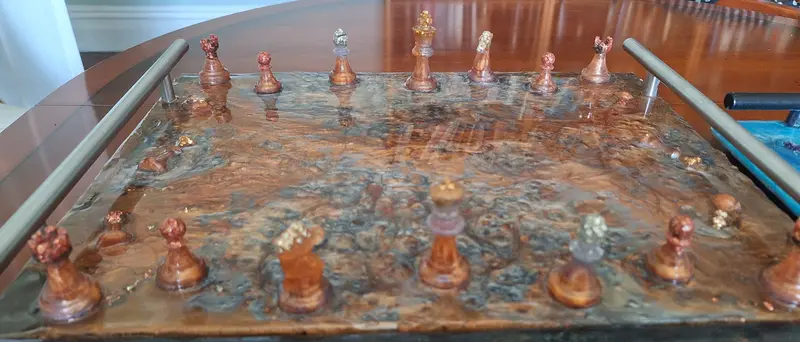
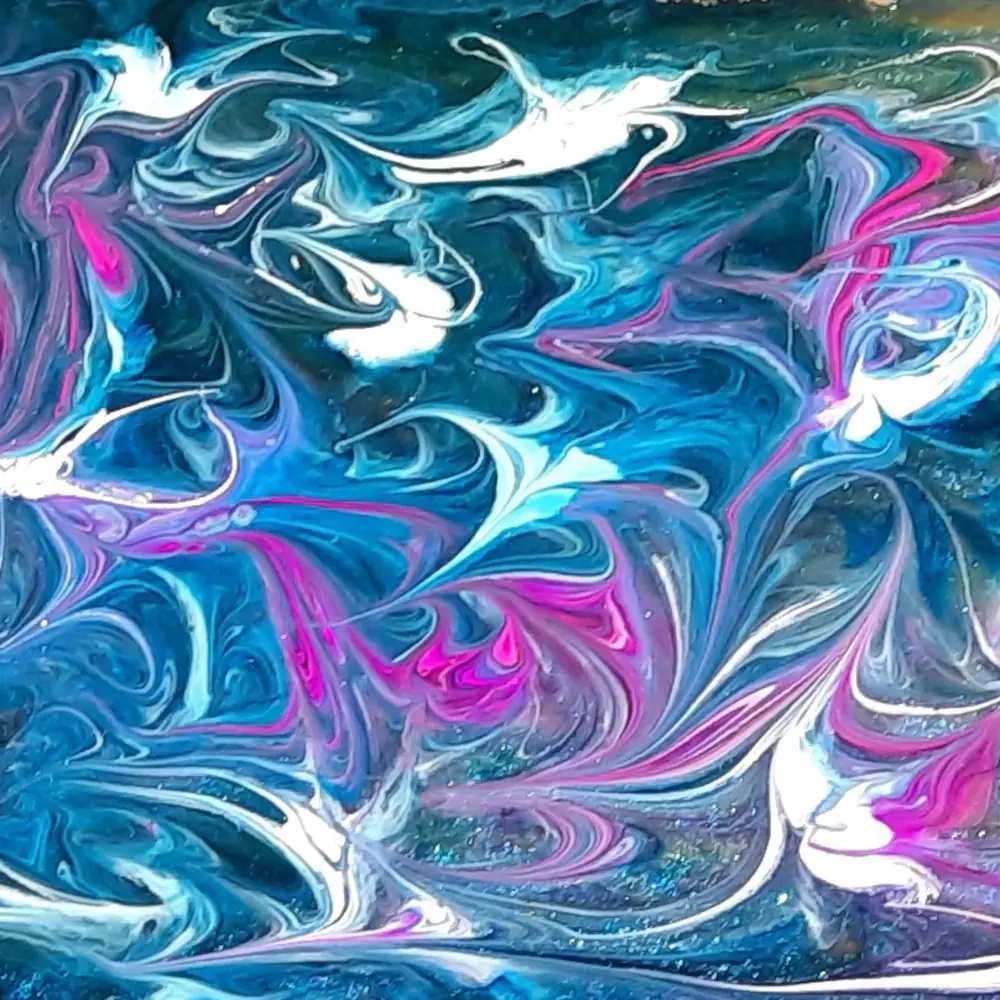
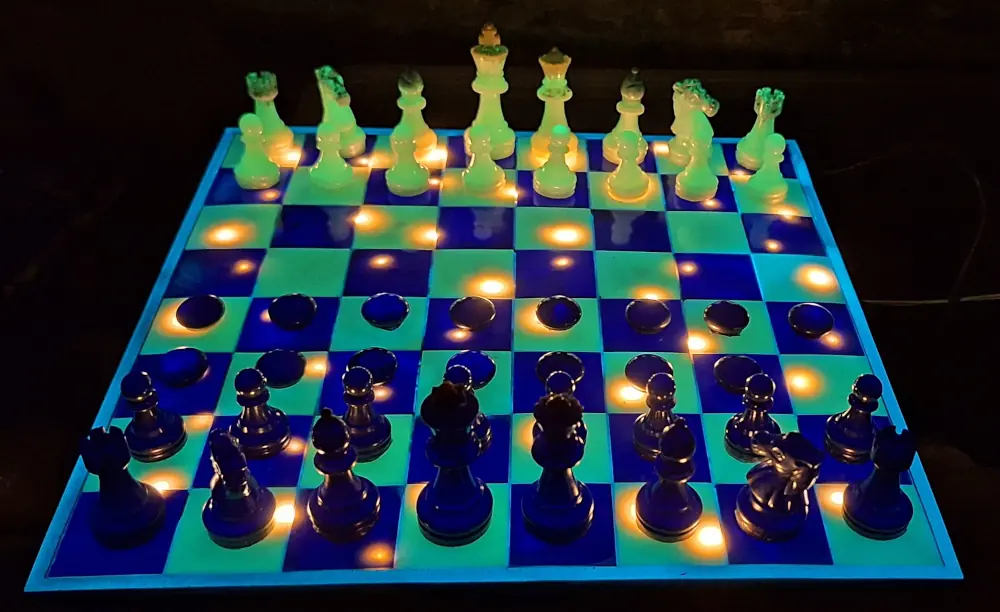
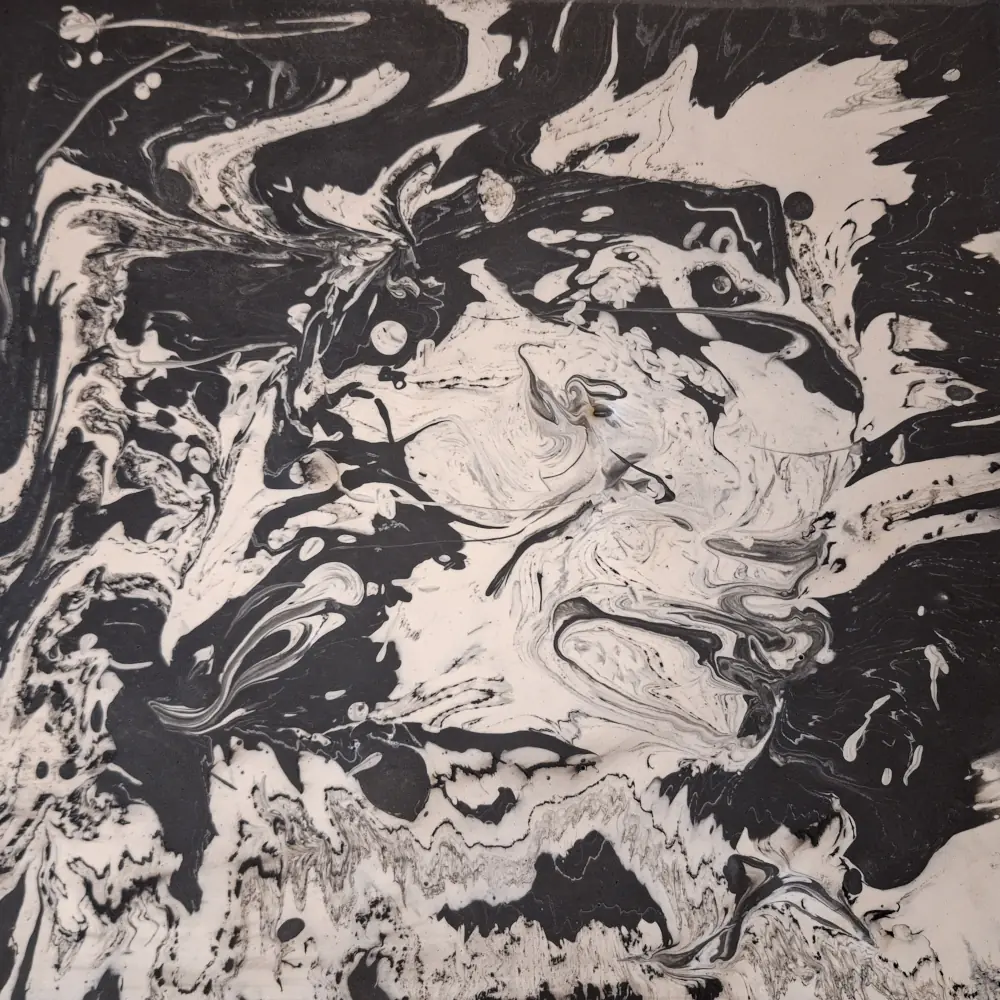
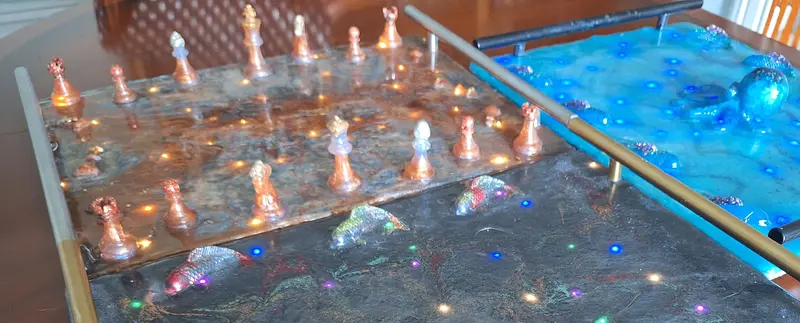
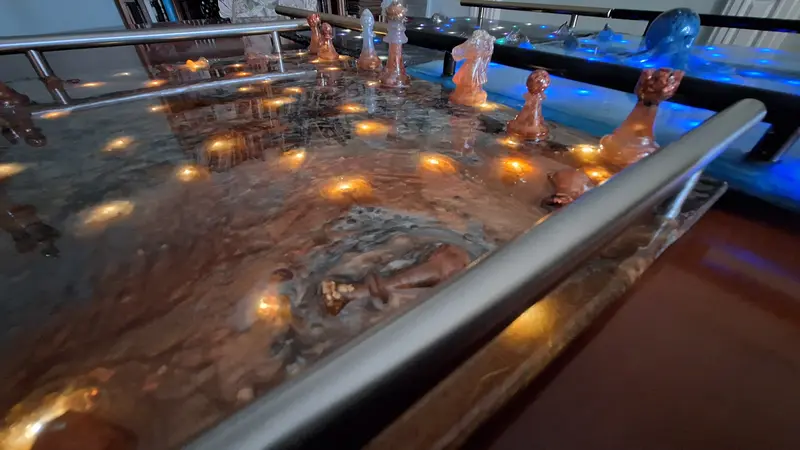
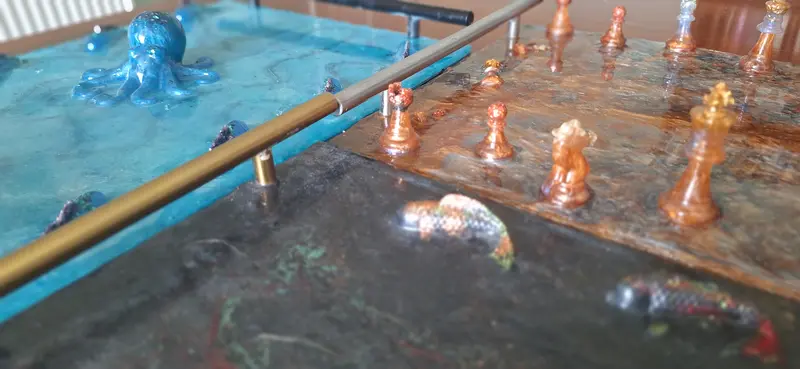
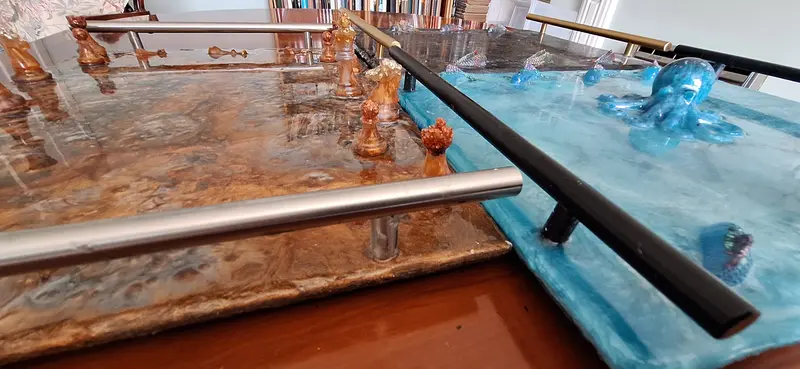
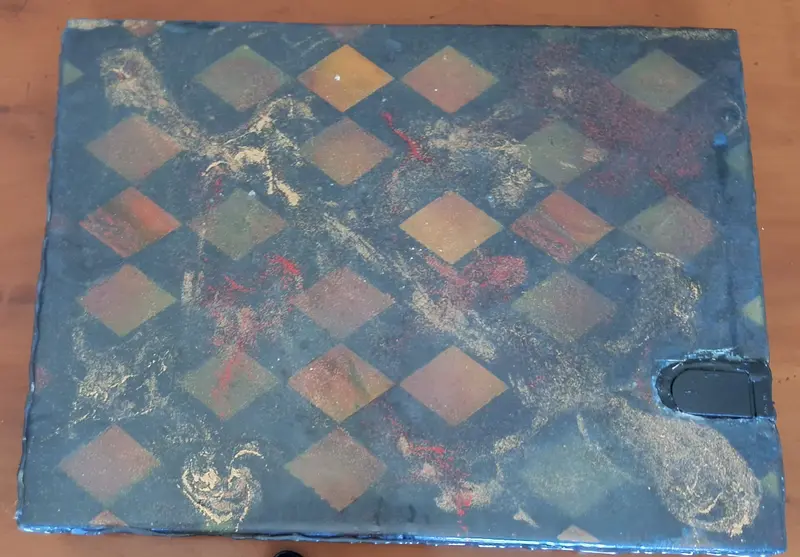
As for the top of the trays, the bit that really matters, both of the two trays which you see here turned out very nicely, beyond the proof of concept, into something which I believe is quite beautiful. Depending on your personal taste, you may react in different manners. They’re very different in concept, clearly. I’m personally fond of the chess-themed tray, as the marbling effect turned out fantastic.
Sometimes you try too hard to achieve a pattern, and it just doesn’t work because you meddled too much. There’s something quite meditative about the process. You need to be very mindful in the preparation, before pouring the resin, of everything that could go wrong, but then when you pour it you have to empty the mind a bit, and let the resin flow.

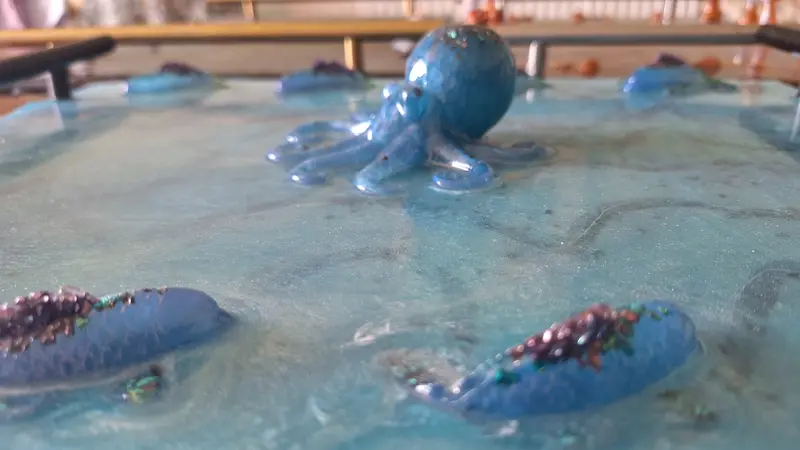
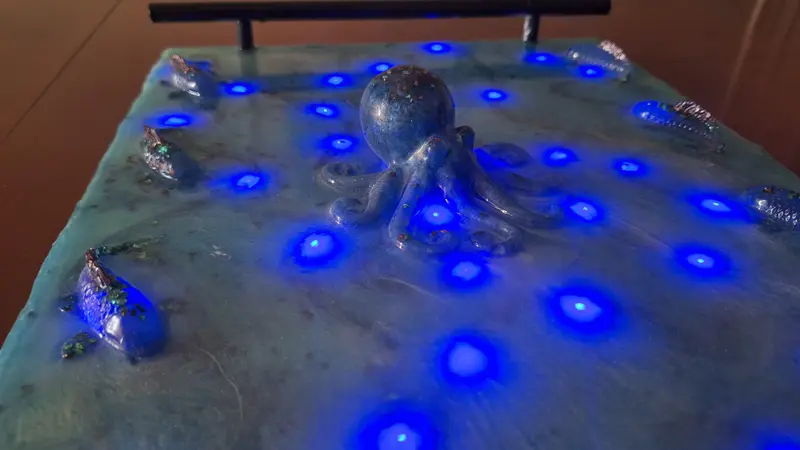
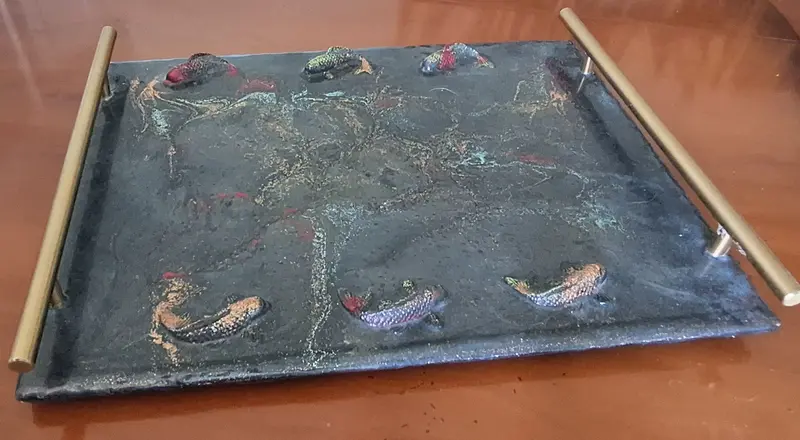
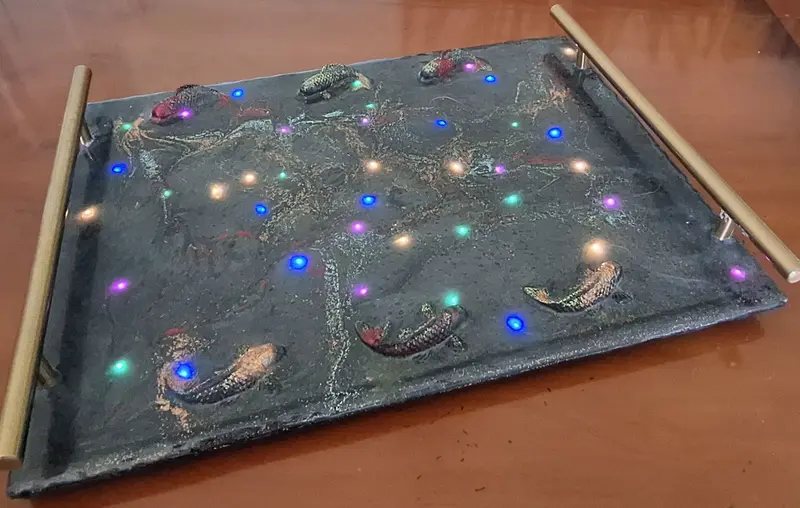
As for the octopus tray, I have had good reactions to it. I think that it does look kind of dynamic. Adding four koi on each side made the sides cohere a bit more, and they seem to interact quite well with the octopus – one of them for each tentacle :~)
Let me just end here with a little gallery of the finished product, from various angles